
I made a Christmas bow yesterday, using my black and white plaid ribbon, and took a few pictures along the way because more than a few friends have been wanting to learn to make their own bows too.
materials
a spool of ribbon
scissors
lighter or matches
floral wire
wire cutters
glue gun
alligator hair clips
rug gripper
rhinestones

Start by cutting your ribbon into two equal pieces, mine are about 16" long, and one shorter piece, about 8" long. Singe your cuts to avoid fraying. Also, use your wire cutters to trim a 2-3" piece of wire.

Fold one of the long lengths of ribbon in fourths, accordion style. Set it aside, and repeat with the second long piece of ribbon.

Pinch the accordion folded ribbons in the center and a arrange in a cross shape. Then, twist your wire around both pieces, trim the excess wire, and wrap it around the center to hold the ribbon together tightly while making sure that the wire is pressed closely around the ribbon.

Use the smaller piece of ribbon to cover the wire. Find the center of the ribbon and knot it around the center of the bow. Fluff the bow to arrange each section - make it look pretty!

Gather your clip, a fourth short length of ribbon, a thin strip of rug gripper, and a rhinestone - if you'd like to add a little extra shine - and heat up that glue gun!

Hot glue the rhinestone to the center of the bow. Then, for a finished look, wrap a piece of ribbon around the clip before gluing the clip to the bow. Insert the ribbon into the clip. Add some hot glue to the ribbon, then proceed to wrap the ribbon up and over the clip, covering the springs on the back side.

Trim the tail of the ribbon and singe to ward off fraying.

Here is a great secret I learned from my cousin, Michelle, who also makes hair bows for her girls - glue a strip of rug gripper to the inside of your clip! It really does help the bow stay in place!

Finally, glue the bow to the covered clip! Another hint: when making a wide bow like this one, I always cover the clip with a wide piece of ribbon because it allows me to arrange and glue many of the sections of the bow to the clip, and this helps the bow keep it's shape. That's it!
I don't know about you, but one of the most frustrating aspects of transitioning into mommy-world is the wardrobe. Your body shape is different, and it seems like someone is always drooling on you or grabbing at you. I just can't buy really nice clothes anymore, even for Christmas, because I know they'll just be destroyed. BUT - just because I don't spend tons of money on my clothes doesn't mean I don't want to look nice. What are we teaching our daughters when we spend time grooming and primping them but neglect ourselves? As a mom, it just takes a lot more effort to put yourself together because you really have to think ahead, "Can I nurse in this?", "Can I spot clean this?", "If this piece gets totally destroyed do I have a plan B replacement - or will I cry spot-on-scene?" and so on. Every part of life is a phase, but I do look forward to dressing for myself again someday, and not having to dress as a napkin!

Hardest of all, especially with an infant, is jewelry. Muscle Man Pete has ruined more necklaces than I care to share, so I've also learned to plan ahead and make baby friendly accessories. I was so happy with the way Adelae's hair bow turned out, that I decided I'd make a second bow for me to wear on my sweater! The only difference is that I added a second short ribbon covering my wire - just to make it a little fuller. Pins are out, and I know Pete will really tug on it, so I just stitched it right on to my sweater! Then, after Christmas, when I want a fresh look, or a fresh sweater (!), I'll carefully snip the bow off again.
This year we are heading "home" for Christmas, and will be worshiping at my childhood church, Trinity Lutheran - Toledo. One of my fondest childhood Christmas memories is singing the Quempas Carol at the Christmas Eve service at Trinity. It was always very special, especially to my dad, who on this night only, always sat in the far right corner of the front pew. Trinity members know that this pew was "reserved" for the Howard and Elanore Drager and their family, but they graciously scrunched together for us that night! Trinity members also know that Mrs. Drager was known for her quaffed, seemingly plastic perfect hair - a continued topic of discussion and wonder in our family - and for Mr. Drager's bow tie collection!
In Mr. Drager's honor, I just had to make Peter a dapper little bow tie to wear to church on Christmas Eve! This was my first attempt at making a bow for a boy, but I can tell you, if he doesn't protest too much, it also won't be my last bow tie! I looked at a lot of patterns for making bow ties, and all of them used old ties or material, I but really wanted to use the same ribbon I used for Adelae's bow. Here's how I made it!
materials
spool of ribbon
scissors
lighter or matches
masking tape
iron
needle and thread

For a little baby boy, Pete's 10 months old, cut about an 11" length of ribbon. You'll also need a shorter scrap of ribbon; it only needs to be a few inches long. Cut the long piece of ribbon with the "V" shooting out, and singe the edges to avoid fraying. I also used the flame to round off the points of my "Vs".

Fold in the sides of the ribbon to make it a little thinner and give the final product a more realistic bow tie look. To help crease my folds, I held them in place with a few pieces of masking tape (or try pins) and then ironed the folds in place.

Fold the ribbon in thirds with one end on top and the other end sandwiched in the middle. Flip it over, because the fold on top should actually be hidden in the back of the tie.

Starting with your first stitch tucked in the middle of the folded ribbon, run a few vertical stitches down the middle of the tie.

Pull the thread tight to pucker the center of the tie, but don't knot and cut the thread yet.

Secure the center by tightly wrapping the thread around the middle several times, then knot the thread and cut off the excess.


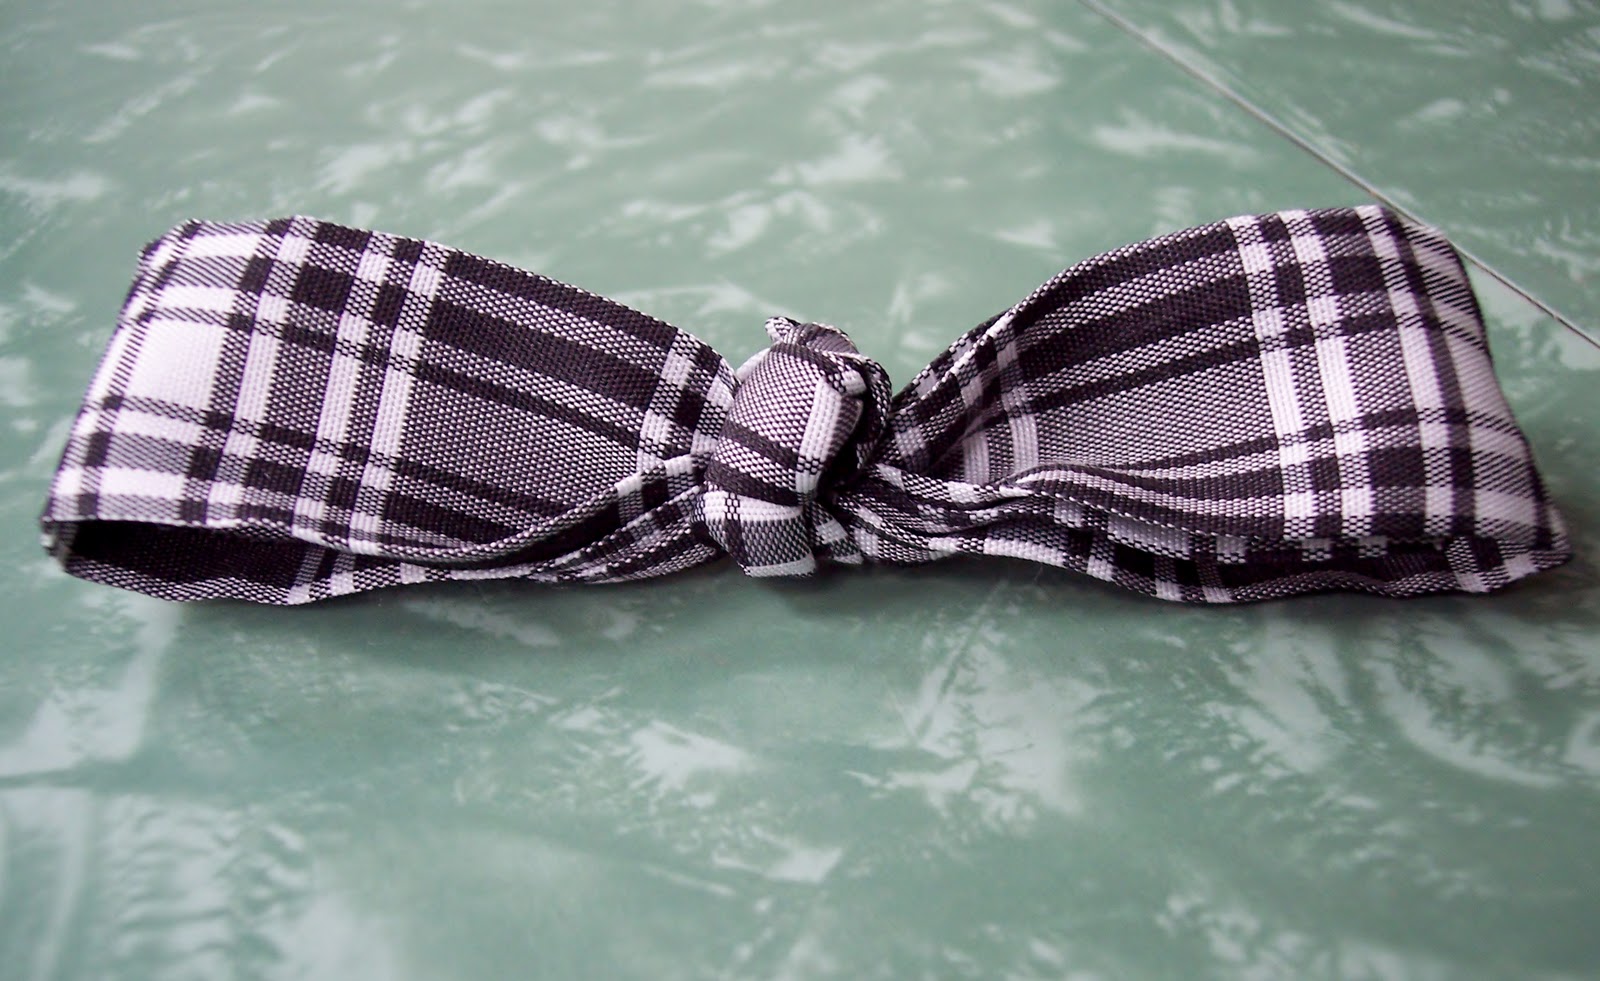
Add a few stitches to the back of the tie to hold the center knotted piece in place. That's it! But how does the tie stay on? Drawing a cord, even a beautiful ribbon, around my son's neck is a sore spot for me! At birth my little Pete almost didn't make it because his cord was tightly knotted and wrapped around his neck twice. The Doctors had never seen a baby with such a knot survive! I'll be taking NO chances with my little miracle!

Instead, I thought about clips or other devices for holding the tie in place, but in the end I decided that my best bet was simply to stitch it on. Four or five quick stitches later, and Pete is one dapper dude! After Christmas I'll snip it off to wash the shirt, and can always sew it on again.
No, I didn't forget about Andy! And, no, he was not willing to wear a bow tie! Accessories for guys are tricky. Bow cuff links? no. Ribbon sock guards? no. A cleverly arranged ribbon pocket square? I didn't think so! In the end, I found a few more little hair clips and covered them with some pieces of ribbon using hot glue. The result?

A coordinating money clip! Traveling over Christmas gets pretty expensive, after all, so why not? Ha!
Merry Christmas!
No comments:
Post a Comment